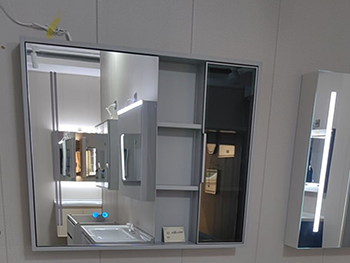
Top Tips for Installing Dimmable Smart Bathroom Mirrors
Introduction
Dimmable smart bathroom mirrors combine functionality with modern technology, offering features like adjustable lighting, anti-fog capabilities, and even Bluetooth connectivity. Installing one requires careful planning to ensure safety, aesthetics, and optimal performance. Whether you're a DIY enthusiast or hiring a professional, these tips will help you achieve a seamless installation.
1. Choose the Right Mirror for Your Space
Before installation, select a mirror that fits your bathroom’s dimensions and style. Consider:
- Size and Shape: Measure the wall space where the mirror will be mounted. Ensure it doesn’t obstruct other fixtures like sinks or cabinets.
- Lighting Features: Look for dimmable LED lights with adjustable color temperatures (warm to cool white) for versatile lighting options.
- Additional Features: Some mirrors include built-in demisters, touch controls, or Bluetooth speakers—choose based on your needs.
2. Check Electrical Requirements
Smart mirrors require a power source, so ensure your bathroom has the necessary wiring:
- Hardwired vs. Plug-In: Hardwired mirrors connect directly to your home’s electrical system, while plug-in models use an outlet. Hardwired installations are cleaner but may require an electrician.
- GFCI Protection: Bathrooms need Ground Fault Circuit Interrupter (GFCI) outlets or circuits to prevent electrical shocks.
- Voltage Compatibility: Verify that the mirror’s voltage matches your home’s electrical system (typically 110-120V or 220-240V).
3. Plan the Installation Location
Proper placement ensures functionality and safety:
- Height: Install the mirror at eye level (around 60-65 inches from the floor) for optimal use.
- Distance from Water Sources: Keep the mirror at least 60cm (24 inches) away from showers or bathtubs to prevent water damage.
- Wall Type: Confirm whether your wall is drywall, tile, or concrete, as this affects mounting methods.
4. Prepare the Wall and Wiring
Before mounting:
- Turn Off Power: Always shut off electricity at the circuit breaker before working on wiring.
- Mark Drill Points: Use a level and pencil to mark where screws or brackets will go.
- Cut Openings for Wiring: If hardwiring, create a small opening in the wall to route cables neatly.
5. Mount the Mirror Securely
Follow these steps for a stable installation:
- Use Appropriate Anchors: For heavy mirrors, use wall anchors or toggle bolts, especially on drywall or tile.
- Align Carefully: Double-check levelness before securing screws to avoid crooked placement.
- Hide Wires: Conceal cables behind the mirror or within the wall for a clean look.
6. Connect Electrical Components
For hardwired mirrors:
- Match Wires Correctly: Connect live (black/brown), neutral (blue/white), and ground (green/yellow) wires as per instructions.
- Secure Connections: Use wire nuts or terminal blocks to prevent loose connections.
- Test Before Finalizing: Turn power back on briefly to check if the mirror lights up before sealing everything.
7. Configure Smart Features
After installation, set up smart functionalities:
- Pair with Apps: If the mirror has Bluetooth or Wi-Fi, follow the manufacturer’s guide to connect it to your smartphone.
- Adjust Settings: Customize dimming levels, color temperatures, and timer functions.
- Update Firmware: Ensure the mirror’s software is up to date for optimal performance.
8. Ensure Proper Sealing and Waterproofing
Bathrooms are humid, so protect your mirror:
- Apply Silicone Sealant: Seal edges where the mirror meets the wall to prevent moisture ingress.
- Check Anti-Fog Functionality: If your mirror has a demister, test it to ensure it works effectively.
9. Maintenance Tips
Keep your mirror in top condition:
- Clean Regularly: Use a microfiber cloth and mild cleaner (avoid ammonia-based products).
- Inspect Wiring: Periodically check for loose connections or corrosion.
- Replace Bulbs as Needed: LED lights last long but may eventually need replacement.
10. Troubleshooting Common Issues
If problems arise:
- Lights Not Working: Check circuit breakers, wiring, or Bluetooth connectivity.
- Fogging Issues: Ensure the demister is properly connected and the bathroom is well-ventilated.
- Unresponsive Touch Controls: Reset the mirror or check for firmware updates.
Conclusion
Installing a dimmable smart bathroom mirror enhances both functionality and style. By following these tips—selecting the right mirror, ensuring proper electrical setup, and securing a waterproof installation—you can enjoy a high-tech, spa-like experience in your daily routine. Always prioritize safety and consult a professional if unsure about electrical work.
Would you like additional details on any specific step?
Ce site Web utilise des cookies pour vous garantir la meilleure expérience sur notre site Web.
Commentaire
(0)